I once tried to build a blog using WordPress during my college days, but its complexity exceeded my ability to control it. Later, I also repeatedly used GitHub Jekyll, but I always felt that it was not user-friendly and couldn't stick with it for more than a few days. Eventually, I preferred using ready-made blog service platforms like Sina Blog, NetEase Lofter, and Jianshu. However, there are serious censorship issues with domestic blog platforms, so I was never satisfied. Then I started using Blogger, but the experience was poor. Fortunately, there was no censorship, so I endured it for a few years. However, this blocked my own story from reaching beyond the wall, which often made me feel regretful. Although I tried using ZeroNet to publish articles, this distributed network can be described as a ghost town with very few serious and real users.
This afternoon, I accidentally came across an article on Zhihu titled "Complete Novice Tutorial: Building a Personal Blog Using GitHub Pages and Gridea" and discovered this super simple blog tool called Gridea. After a simple understanding, I found that this is exactly what I need - a simple and free way to create a blog that I can control and (almost) not be censored. It's really simple!
Below, I will describe the process of creating and configuring my blog step by step, including registering and configuring a GitHub code repository, downloading and configuring the Gridea client, selecting a suitable blog theme, binding a domain name, configuring Google Analytics, and publishing articles.
1 Register and Configure GitHub Code Repository#
First, register a GitHub account. If you don't plan to use your own domain name, please carefully choose your "username" because it will be used as your blog address in the form of "username.github.io".
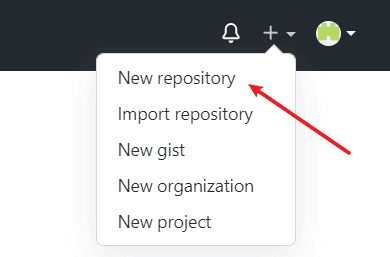
After registration, click the "+" button in the upper right corner, then click "New repository" to create a new code repository:
Then, fill in your "username.github.io" in the Repository name field and create the repository:

At this point, you will have an empty code repository.
Click on your profile picture in the upper right corner, go to Settings, find Developer Settings, select Personal access tokens, and then click Generate new token:

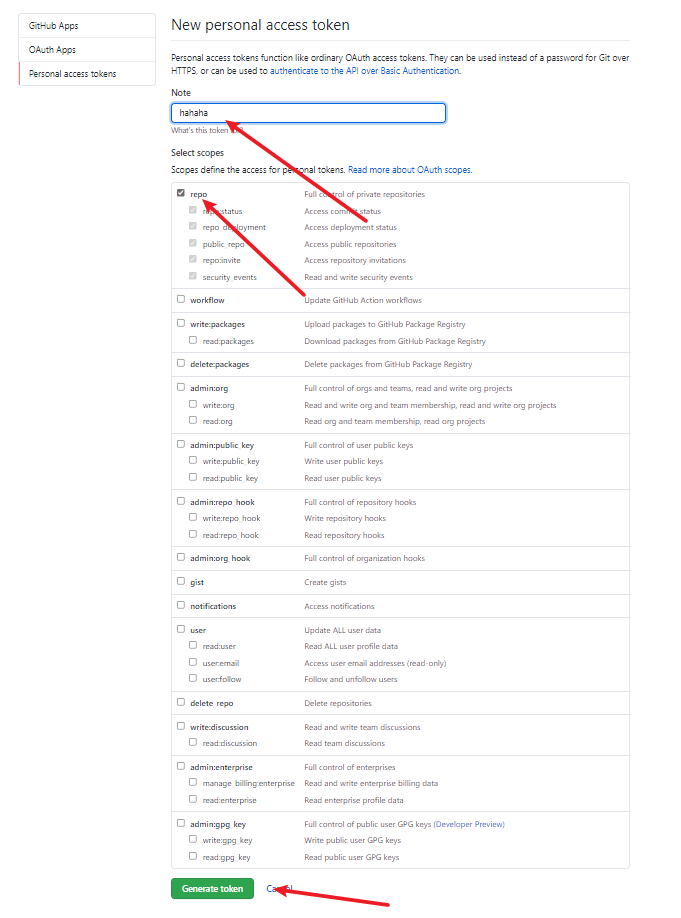
Fill in any note in the Note field, check repo, and then click the button to generate the token at the bottom:
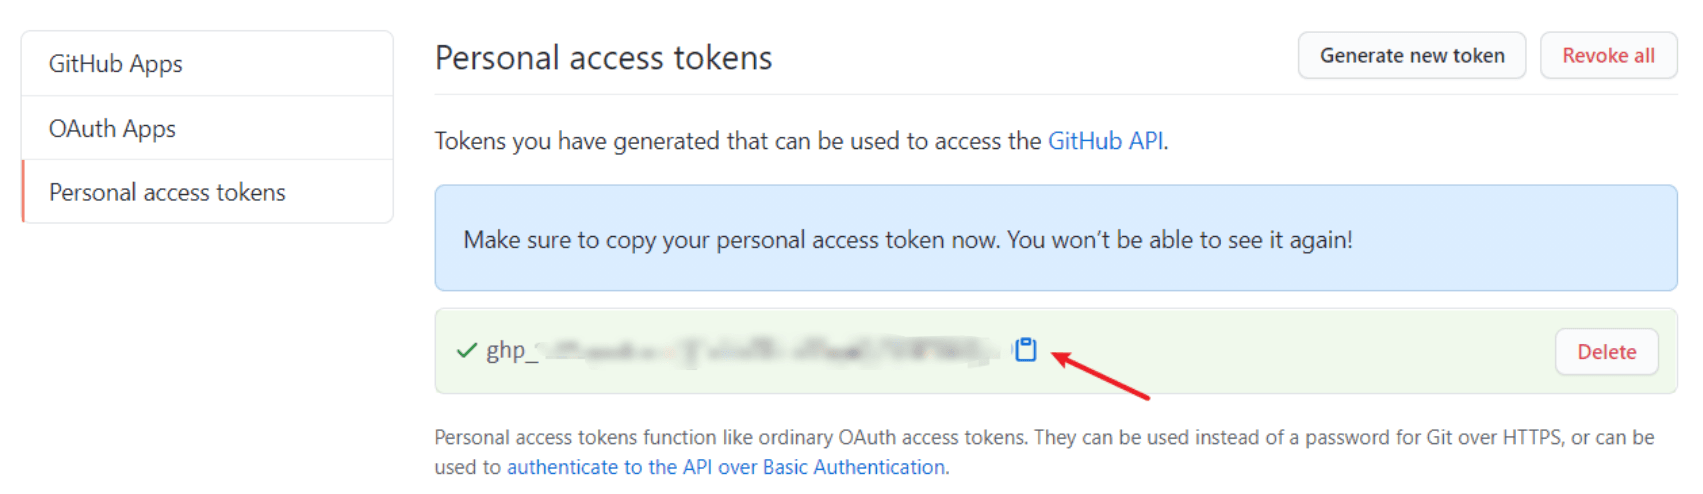
Copy the token starting with ghp_. Please note the blue warning: You will not be able to see this string after leaving this page. If you accidentally lose this token, don't panic, you can repeat the above steps to generate a new one.
2 Download and Configure Gridea Client#
Download and install the Gridea client for your operating system from the Gridea official website or its GitHub code repository.
First, go to "Remote" for configuration. Choose GitHub Pages as the platform, select "https://" for the domain name, and fill in your "username.github.io" for the repository name. You can fill in either "master" or "main" for the branch, your username is your username, the email is optional, and paste the token in the token field. If you have your own domain name, enter it in the CNAME field; otherwise, leave it blank. Then click "Save" in the lower right corner and click "Check Remote Connection" in the lower left corner. I occasionally encounter connection issues, probably due to some bugs. If there are no issues, you can "Sync" your initial blog to GitHub.

After successful synchronization, wait a short time and you should be able to see your blog by visiting "username.github.io".
The initial blog comes with two preset articles, one is a welcome article and the other is an "About" article. Both can be deleted or modified.
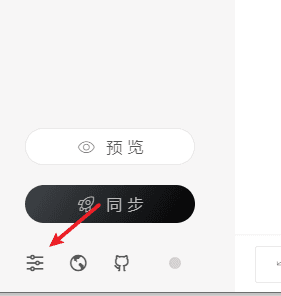
In addition, if you want to manage your blog in a folder of your own choice (such as syncing it with a folder on your cloud storage), you can click the settings button in the lower left corner and configure the "Site Source File Path":
3 Choose a Suitable Blog Theme#
In the Gridea client, go to the "Themes" window to choose a blog theme. After choosing, be sure to click "Save" and apply it to your blog after successful synchronization:
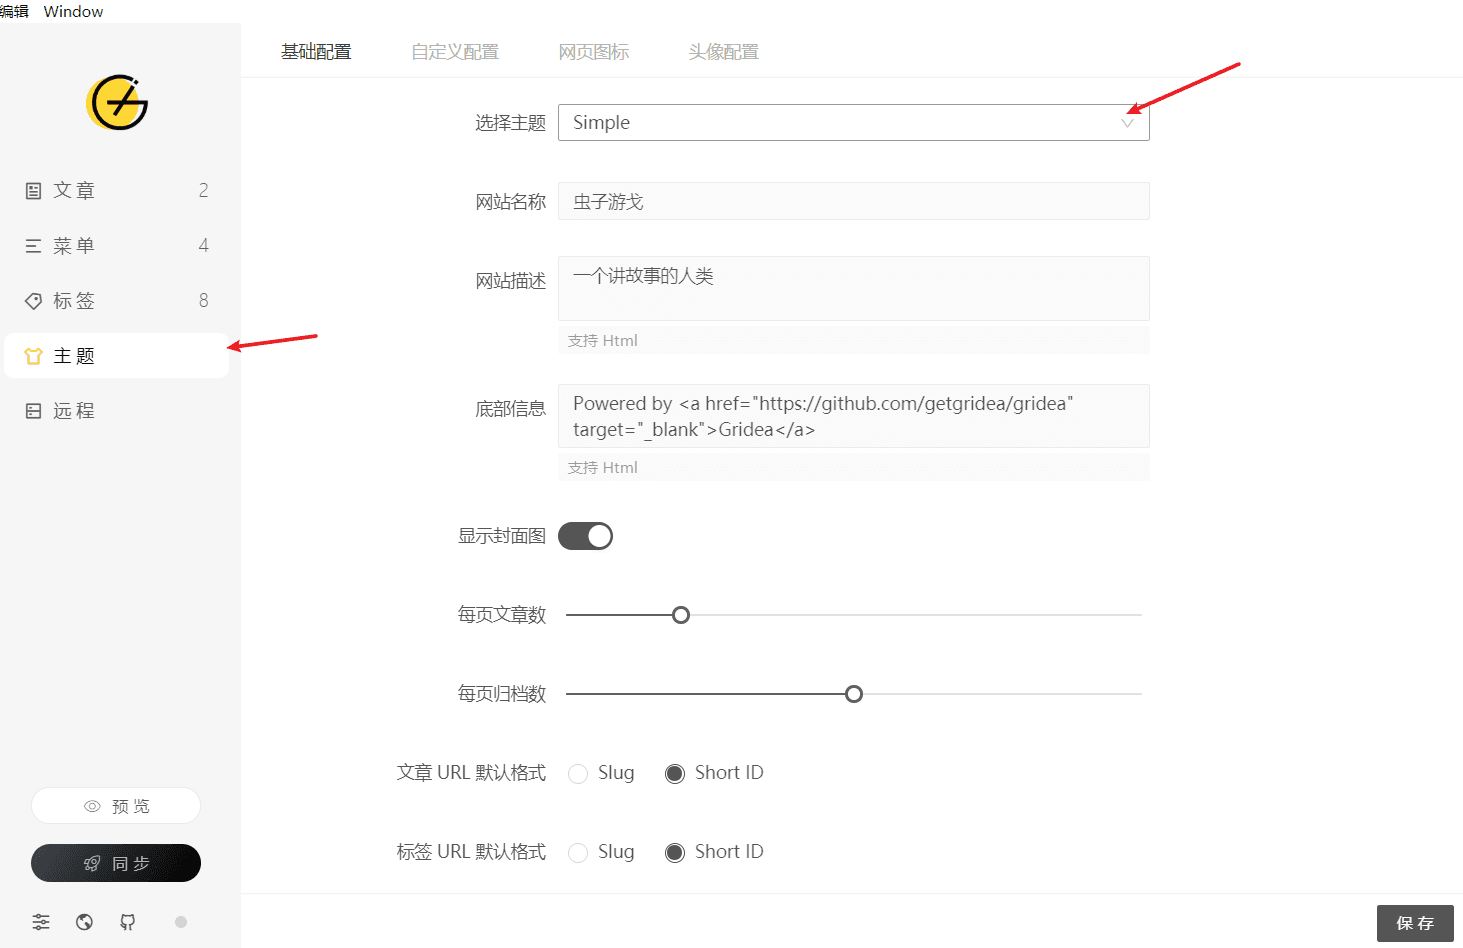
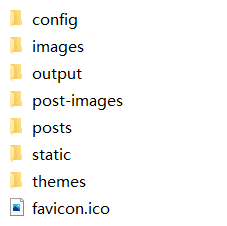
Gridea comes with 4 preset themes, but they may not suit your taste. You can also download themes that interest you from the official theme page. Then, unzip the downloaded theme and place it in the themes directory under the "Site Source File Path". After that, close the Gridea client and restart it, then select the theme again.
Of course, you can also modify your theme. This can be done through the "Custom Configuration" in the Gridea client or by modifying the corresponding files in the theme or the corresponding configuration files in the config folder.
4 Bind a Domain Name#
My domain name, czyouge.xyz, was purchased a few years ago from GoDaddy. It was quite cheap at the time, and the price should not be high now. After the purchase is completed, go to the DNS management of the domain name and add several records as shown in the following figure:
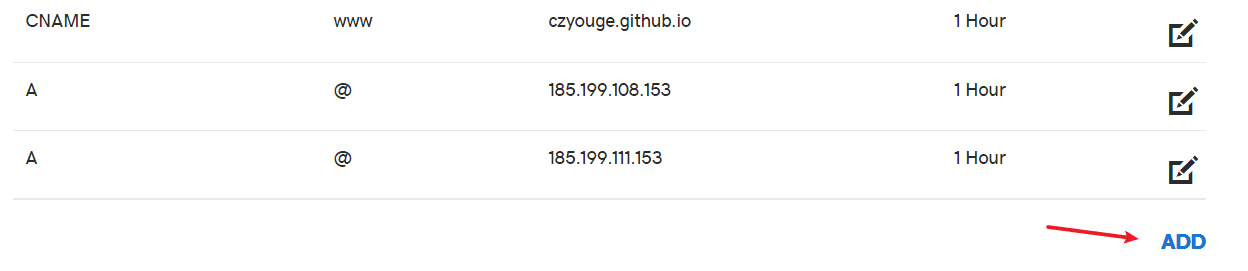
One of the records is a CNAME record. Fill in "www" for the name field, or you can use other names, such as "blog" - this way, you can access your blog through blog.yourdomainname. Fill in your "username.github.io" for the value field.
In addition, add one or more A records to achieve more secure HTTPS access. The IP addresses for the A records can be selected from:
- 185.199.108.153
- 185.199.109.153
- 185.199.110.153
- 185.199.111.153
For more details, refer to this Zhihu answer.
Then go to your GitHub code repository and select Settings:

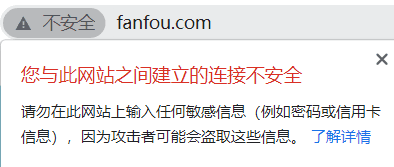
Then select Pages, enter your domain name in the Custom domain field, and save it. Then wait for the verification to complete, click Enforce HTTPS. This will force the use of HTTPS even when accessing your domain with http://. It will automatically redirect to https://.

This feature is very useful. At least the Chrome browser will not issue security warnings when opening your blog. For example, when accessing Fanfou, you will receive such a warning:
5 Configure Google Analytics#
If you want to know the access data of your blog, you can use Google Analytics for free. Gridea also provides very simple and easy-to-use support.
First, register a Google account and then go to Google Analytics. Click on "Admin" in the lower left corner:

Then create an account in the "Account" section. You will get a tracking ID in the format of UA-xxxxxxxxx-x. Next, go to "Property Settings":

Set "https" for the "Default URL" and enter your website URL:

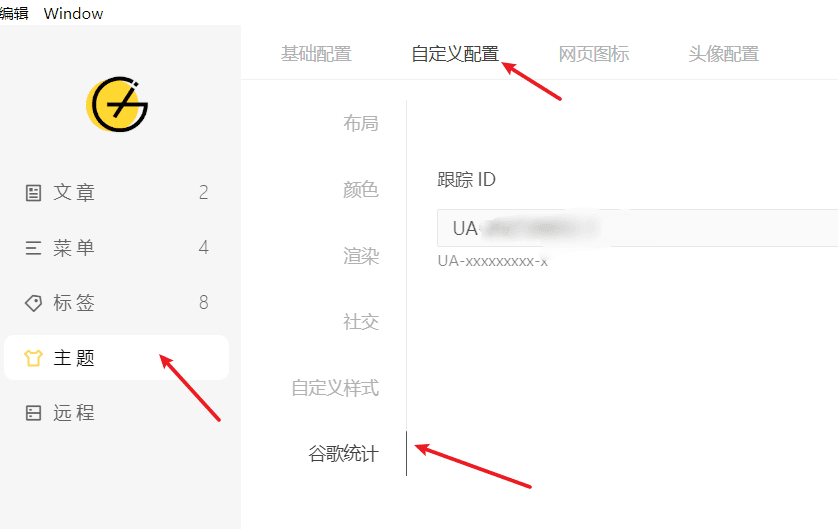
Then, in the Gridea client, go to "Themes" -> "Custom Configuration" -> "Google Analytics" and enter the tracking ID:
After that, you can view the blog access data report through Google Analytics.
6 Publish Articles#
With Gridea, there are two ways to publish blog articles.
One way is to add articles using the article window in the client:

But this method is a bit cumbersome.
The second method is to directly place the Markdown articles in the posts folder under the "Site Source File Path". When using this method, there are a few things to note:
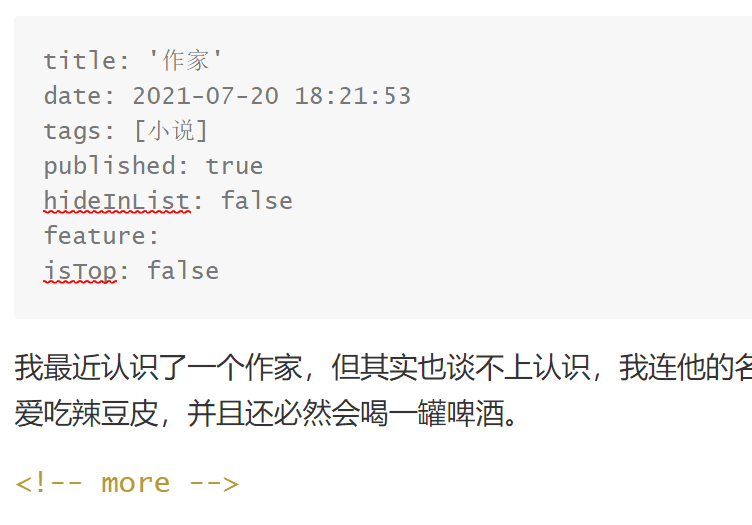
- The name of the Markdown file is the link ID of the article.
- The file contains some important metadata: title is the article title, date is the display time, tag is the tag, published indicates whether it is published (false means saving it as a draft), hideInList indicates whether it is hidden (it will not appear in the article list when hidden), and isTop indicates whether it is pinned to the top. The feature parameter is the link to the cover image of the article (can be left blank).
<!-- more -->is used to separate the summary and the rest of the content.- Also, if you are editing a Markdown file with images in other locations, please pay attention to the relative address of the images.
Finally, remember to "Sync" to your GitHub code repository after any operation, so that your articles can meet the readers.